
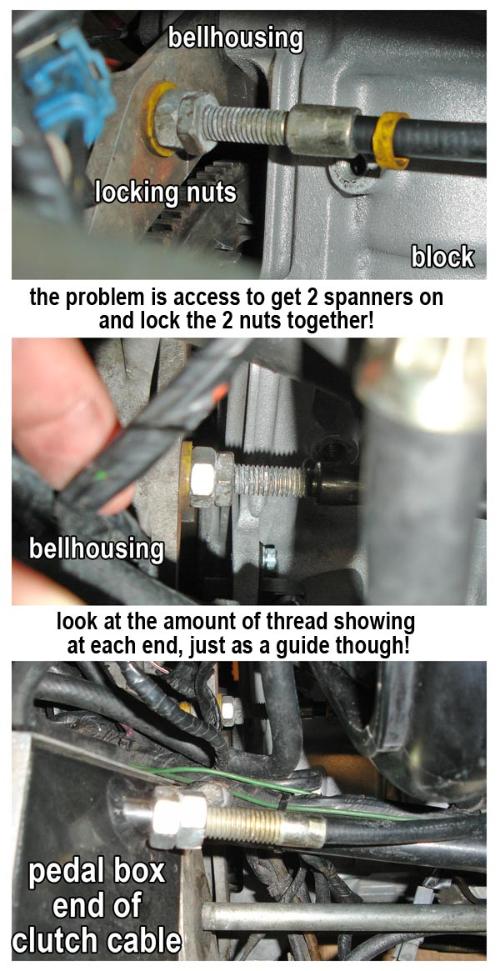
We suffered from this problem, and having learnt about it have subsequently managed to help 2 fellow owners who have been stranded at the side of the road thinking their clutch has broken. What happens is that a combination of vibration and use loosens the 2 locks nuts found on the clutch cable adjustment near the bellhousing. The reason for 2 nuts is that they are supposed to lock each other and prevent them from moving, but what can happen is that they lock together and both move! Obviously as these nuts move the cable is adjusted. This usually leads to a progressively shortening clutch pedal, so that gradually the pedal has to be pushed to the floor to change gear, until there is not enough movement left to engage the clutch.
The solution is to reach down, pull the cable out of the bellhousing mount slightly (it will have gone in too far as the nuts move along the thread) and then readjust the nuts back up to the bellhousing flange, making sure that you tighten one, then theother up against it, so locking them properly Access with 2 spanners can be a pain!!
It is interesting that I had not noticed this before posting these pictures, but it almost looks as if these engine mounts are actually slightly different in height, but I think this is an illusion caused by a slightly different rubber moulding, where the 'old' engine mount has a larger fillet on it.
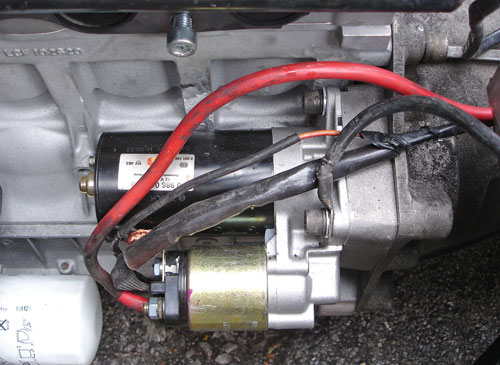
Briefly, we upgraded our starter motor recently as our old one was having trouble turning a higher compression engine fast enough for the Emerald ECU to be able to get a signal from the crank sensor - you can read about this elsewhere. The new starter motor has a higher gearing than the original, as as soon as we installed it (a direct replacement) it was immediately obvious that the engine was turning over much more quickly than before, solving the starting issue. However the new starter motor is a slightly different design to the old one in that the solenoid is mounted on the outside of the motor, where as the previous model had the solenoid mounted on the top surface of the motor. This causes a clearance issue with the older 4-1 Caterham SLR exhaust system we had on our car - specifically it is manifold number 4 that comes very very close to the solenoid. This might cause heat issues which may prevent the solenoid from functioning properly.
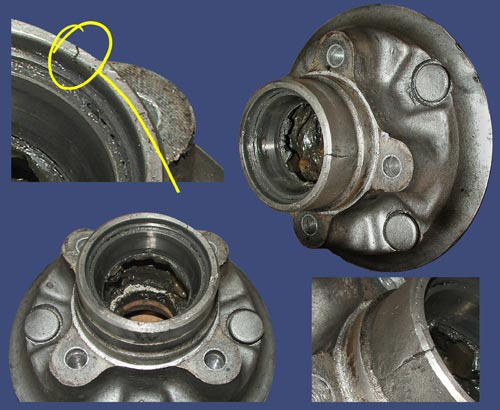
Now I am pretty sure this is not a common occurrance, but nether the less, worth knowing about and checking for... Recently I was pushing the car out of the garage and noticed a creaking sound, which seemed to come from the front wheel. In the past a similar noise can be heard as the anti-roll bar creaks in its bushes, but this seemed to come from the hub itself, or rather from the bearing. I had adjusted the bearing a day or so before as there was a bit too much play in the hub, in fact this had been highlighted during an MOT test the day before. A wobble of the wheel showed that it was still a little loose, so while it was jacked up I spun the wheel to see if I could see anything. It was whilst doing this that I noticed what looked like a deep score in the alloy hub.
A wipe with a cloth showed that it was indeed a groove filled with grease and dirt. A further wipe showed that actually it was indeed a crack in the hub!! The hub had split around the bearing, so as I tightened the bearing up I was actually spreading the crack and making it worse - this also explained why the wheel kept wobbling despite being adjusted. I cannot believe how lucky we were to find this - I actually found this at 10.30 pm the night before we set off for our summer trip to the Swiss passes - I shudder the think what might have happened if this had given way anywhere en route. Thanks to Mark who was a) still up and b) had a spare cast hub that we could steal and use!
|


 One of the clues to a broken or loose engine mount is marks in the side skins, caused by the exhaust pipes moving with the engine, as it flexes under acceleration.
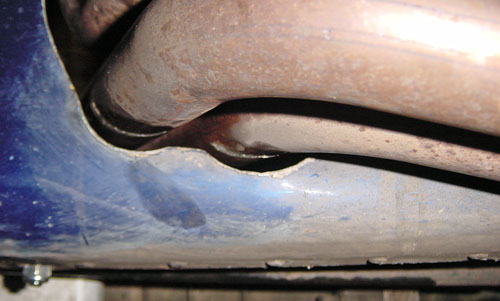
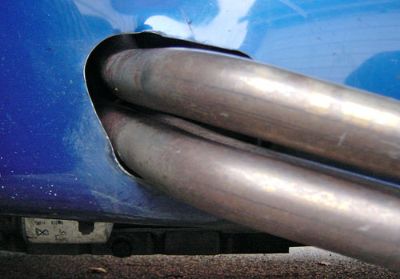 Obviously this clue might only be visible if you have a well fitting exhaust cut-out.
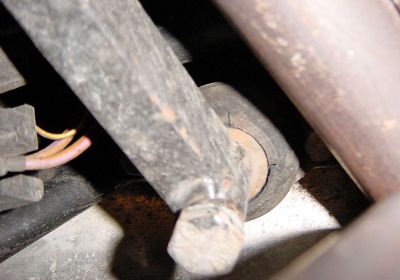 It might be quite difficult to actually see if the engine mount is broken, but it is worth poking around with a torch.
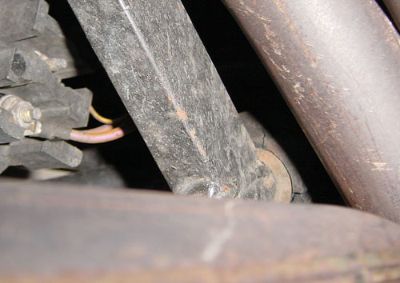 This is the near side engine mount, seen in between the alternator and the exhaust manifold.
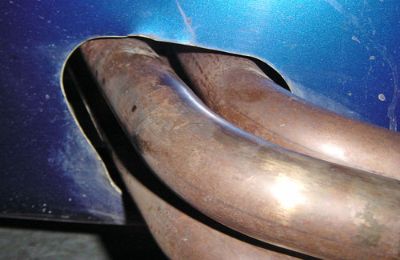
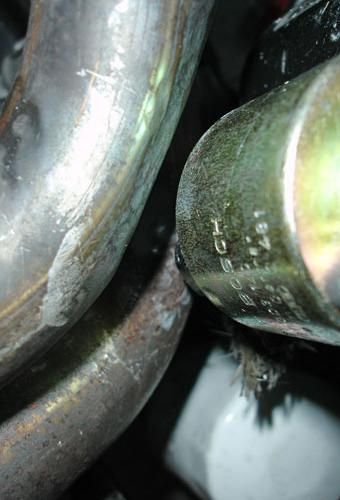 This picture shows how the 4th exhaust manifold runs very close to the solenoid on the starter motor. In this picture you can just about see where I have managed to shape the pipe and pull it away from the solenoid slightly. Of course the proper solution is to buy a new manifold pipe from Caterham....££
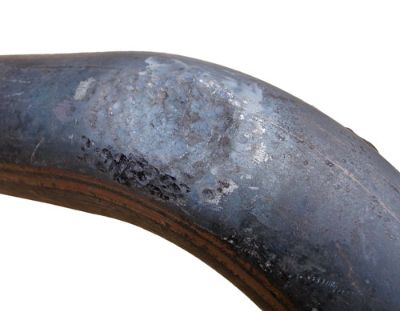 I heated the pipe to glowing red with a blowtorch then carefully bashed the dent with a round hammer! It worked fine, with no cracking or obvious signs of splitting the stainless pipe.
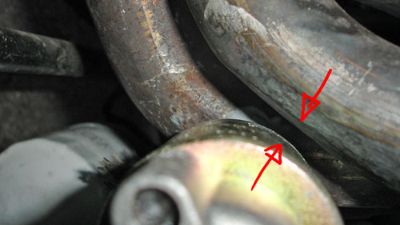 By doing this I managed to increase the gap from about 2mm to about 10mm - the air gap would provide a decent heat insulating layer.
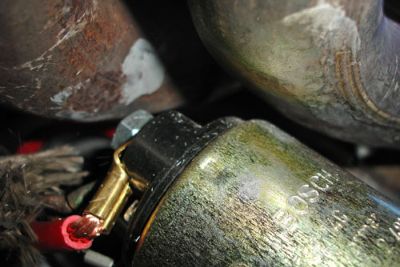 This photo and thenext one also show how close the 3rd manifold also runs very close to the solenoid...
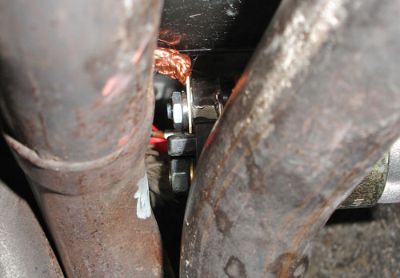 ...however in this case the pipe is very close to the wire connections on the starter motor. This is a bit dangerous - it means that you must be VERY careful that there is not contact between the two...
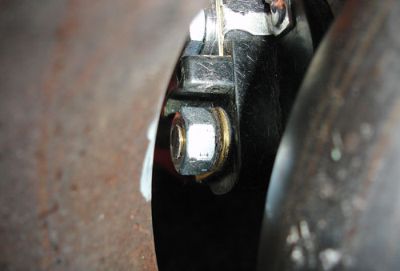 ...and you must disconnect the battery before trying to remove the exhaust or the starter motor - and yes I did 'learn' this in a shower of sparks and a spanner welded to the exhaust!!
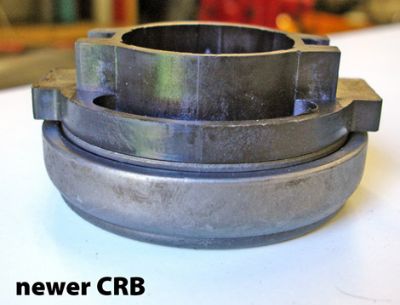 Problems with the Clutch Release Bearings on Caterhams are well documented, with conflicting stories, problems and solutions...
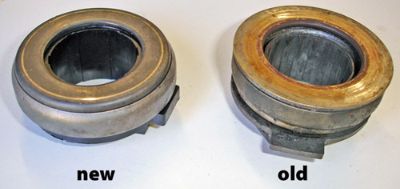 ....one of the 'solutions' has been a change in the supplied part from Caterham. I have to be honest - I am not sure if this is the current model as supplied.