This section will look at cooling related issues, including coolant leaks. It seems to be particularly important that the cooling system on the k-series is functioning correctly, as it seems any small issues can go on to cause bigger problems.

We fitted this aluminum radiator to replace the old original steel and copper one. The new radiator would give us much more efficient cooling, and indeed since fitting our water temperature has just about never got too high, even with hard track use. With the old radiator we would sometimes see the needle rise to about 90° plus on track.
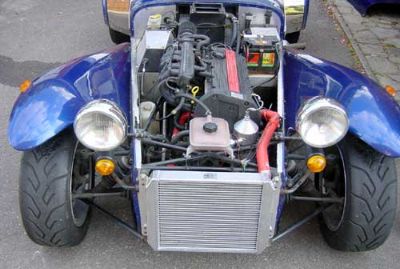 Nice new Radtec aluminum radiator installed, together with new silicone hoses. Nice new Radtec aluminum radiator installed, together with new silicone hoses.
We also changed the thermostat at this time to one with an operating temperature of ° - bought from Halfords, the part number there is
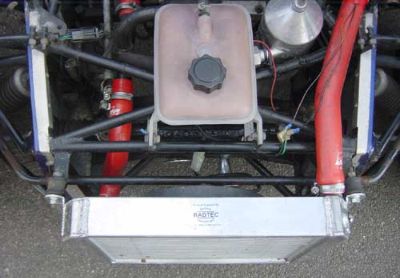 The wires that can be seen here are temporary, by-passing the notoriously unreliable fan switch, which seems to break regularly. We have since fitted a manual over-ride switch in the dashboard. The wires that can be seen here are temporary, by-passing the notoriously unreliable fan switch, which seems to break regularly. We have since fitted a manual over-ride switch in the dashboard.
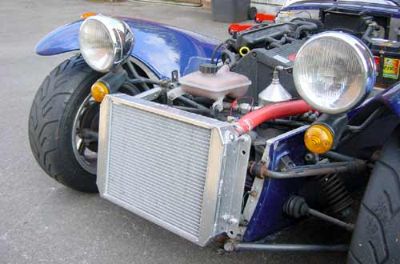 Looks pretty clean - for now! I had to make up some simple brackets to mount the original fan onto the back of the new radiator. Looks pretty clean - for now! I had to make up some simple brackets to mount the original fan onto the back of the new radiator.
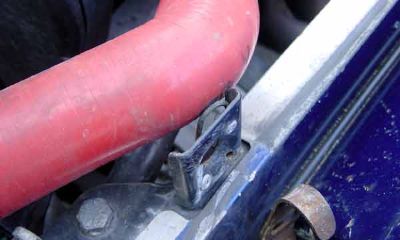 A potential leak spot, where the coolant pipe is rubbing on the nose-cone mounting bracket. Sliding the pipe further onto the water rail solved this issue. A potential leak spot, where the coolant pipe is rubbing on the nose-cone mounting bracket. Sliding the pipe further onto the water rail solved this issue.
 No idea how this leak could have been caused in the silicon pipes. It is on the pipe that runs from the bottom of the radiator to the engine. I repaired it with rubber sheet and some jubilee clips. No idea how this leak could have been caused in the silicon pipes. It is on the pipe that runs from the bottom of the radiator to the engine. I repaired it with rubber sheet and some jubilee clips.

 Bleeding! I was very concerned one day to discover a coolant leak, which looked like it was coming from the Head Gasket joint. The coolant seemed to run from the rear nearside corner of the engine. Bleeding! I was very concerned one day to discover a coolant leak, which looked like it was coming from the Head Gasket joint. The coolant seemed to run from the rear nearside corner of the engine.
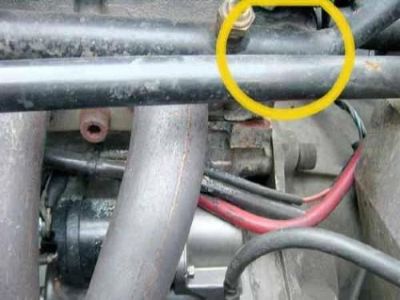 Source of the leak was actually the coolant rail, where it enters the head (behind the pipes in the yellow circle)Coolant was leaking from here, down onto the head gasket joint, and running along this - giving the impression of a leaking head gasket. Phew.. Source of the leak was actually the coolant rail, where it enters the head (behind the pipes in the yellow circle)Coolant was leaking from here, down onto the head gasket joint, and running along this - giving the impression of a leaking head gasket. Phew..

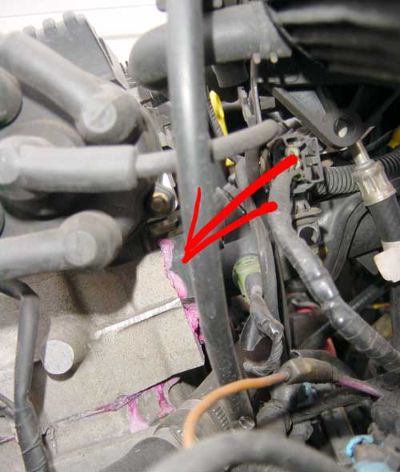 Bleeding Engine 2 - another coolant leak has been discovered! Again I spotted it running along the head-gasket split line, but traced it back up towards the inlet manifold, from where it is dripping down the block to the head gasket. Why is it leaking from here? Is it simply a case or replacing a gasket or tightening the manifold bolts? Photo is looking along the inlet side of the engine, from the back to the front. Bleeding Engine 2 - another coolant leak has been discovered! Again I spotted it running along the head-gasket split line, but traced it back up towards the inlet manifold, from where it is dripping down the block to the head gasket. Why is it leaking from here? Is it simply a case or replacing a gasket or tightening the manifold bolts? Photo is looking along the inlet side of the engine, from the back to the front.
SOLUTION TO THE ABOVE! Many thanks to Dave Andrews of DVA power www.dvapower.com who helped me out on this one. The problem is a leaking inlet manifold gasket. The older ones are (black) rubber and can crush/flatten/deteriate etc. Straight swap for a new one - but make sure it is the updated GREEN version. I need to change it ASAP, as water could be getting into the cylinder - not good!
 Inlet Manifold Gasket Make sure the new one is green. Inlet Manifold Gasket Make sure the new one is green.
At the same time, there are traces of coolant around the pressure cap on the expansion tank - have I over-filled coolant when I re-filled after repairing the last leak (water coolant rail gasket) Does over filling cause over pressure when hot, causing coolant to be forced out near the inlet manifold gasket? Not sure, but it is more likely to be pressure in the system caused by the leak around the inlet manifold. I have replaced the expansion tank pressure cap in case of a fault there.
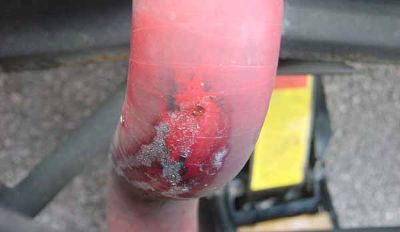
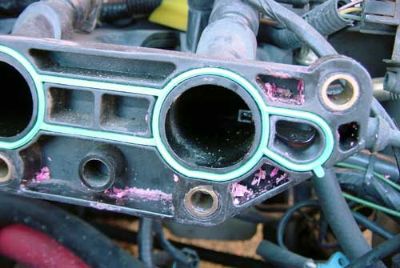
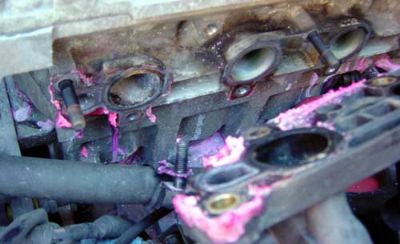 What a mess! 'Red' coolant very visible! The leak was around the coolant channel to the left of the first inlet. This allowed coolant into the cylinder - not good! What a mess! 'Red' coolant very visible! The leak was around the coolant channel to the left of the first inlet. This allowed coolant into the cylinder - not good!
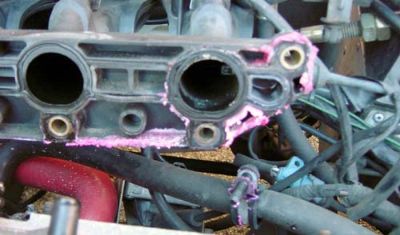 Looking back onto the inlet manifold itself, with the old black gasket still in place. Looking back onto the inlet manifold itself, with the old black gasket still in place.
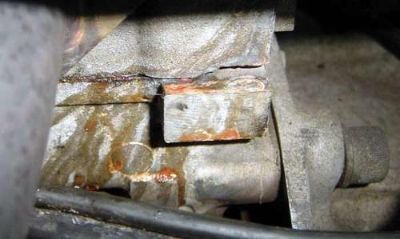
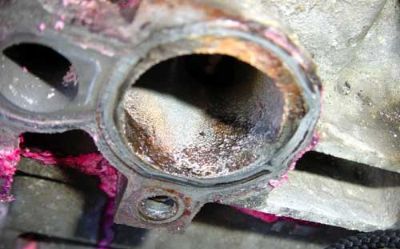 Crusty deposits in the inlet. All the other inlets are clean, so this is entirely due to the coolant leak. Crusty deposits in the inlet. All the other inlets are clean, so this is entirely due to the coolant leak.
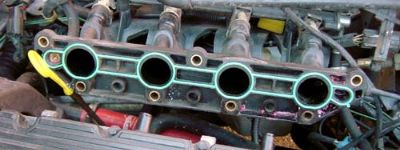 New, green gasket in place. Make sure it is seated properly in the gasket channel, or it may get pinched on re-assembly. New, green gasket in place. Make sure it is seated properly in the gasket channel, or it may get pinched on re-assembly.
 Flat part of the gasket to the bottom. Hard to get wrong as the gasket sits in a deep channel. Small loop on the far right is the coolant channel. Flat part of the gasket to the bottom. Hard to get wrong as the gasket sits in a deep channel. Small loop on the far right is the coolant channel.
It just so happens that in doing this job I knocked or disturbed various electrical cables and wires which subsequently led to all sorts of running problems, which can be seen in the 'Electrical' chapter of this section.
|