

The recent work on our car has been the result of one thing - a huge amount of help from fellow 7 owner, Mark Collins - or 355GTS as fellow Blatchatter's will know him. Most of these shots of our car in various states of dis-repair have been taken whilst at Mark's garage.
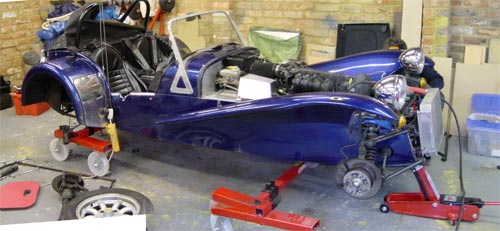
Apart from the fact that he has space, Mark also has the right tools, which makes a huge difference to jobs. Perhaps most useful, apart from just space, is an electric winch/crane, dollies, a couple of axle stands and trolley jacks - this means that the whole car can be taken apart safely, engine and gearbox removed, suspension components removed etc etc.
The other resource is Mark himself of course. Having taken apart and re-assembled most type of car he has a knowledge that means I can confidently allow him to help us and lead me in working on the car. His help has been invaluable, as has the hospitality we always get whenever we go round to visit from Barney and Kate - thanks guys - it is all massively appreciated!
Ok - it takes courage to post pictures like this! As an advocate of 7 usage in all weathers it pains me to admit that this was the state of the underside of our car! The 'Polishers' will cringe!! In our defense it seems that our car, being a '95 vintage, was blessed with less than perfect powder-coating, along with other cars from that era.
These pictures have been taken after I have started to remove the loose rust and dirt - hence the 'clean' nature of this rust.
This corrosion is more worrying. After the original powder coating had fallen off, it allowed the steel chassis to come into contact with the aluminum of the bodywork. This causes a chemical reaction and turns the aluminum to powder as it oxidizes. In this case the ali sheet has become so thin it has started to fall apart.
I tidied up what I could but of course the fear is that there is further damage elsewhere in the chassis which I cannot see or fix. I am resigned to this and the plan is, in a couple if years, we will treat the car to a complete refresh, where we strip the chassis, get it all treated and then reskin it. A big and expensive job, so it will have to wait for now, but when it is done we will effectively have a new car, ready for the next 100,000 miles.
The re-painting of the chassis coincided with the upgrading of the suspension components. Our car had the standard Caterham set up of Bilstein dampers and springs. There is nothing wrong with this setup, but ours were clearly getting tired - after almost 70,000 hard miles this was hardly surprising. In fact I suspect the dampers and springs themselves would happily carry on, but the bushes involved were certainly past their best, and in fact it was these getting loose and worn that was possibly leading to our slightly uneven tire wear and sagging front. After seeking lots of advice from fellow 7'ers in Blatchat's technical forum, Techtalk, and specific help from Club Sprint Champion Dave Jackson, I settled on a set-up to try. This consisted of a set of Freestyle adjustable dampers, new springs and some new anti-roll bars and new bushes all round. The Freestyle dampers are AVO based, but specially valved to the Freestyle spec for Caterhams. Len and Gary of Freestyle are well known in the 7 world, particularly for their new in-board front suspension. Both are very approachable and free with excellent impartial advice, and thanks to Len for his help whilst I asked many questions about what a good set-up would be for our car use. I chose to spec my own springs, simply because I wanted to play around with settings as part of my learning process. I went for 250lb springs at the front, and 125lb at the rear, on the advice of Dave Jackson. This is a very soft setting at the rear, but it has obviously worked for him, winning the 2003 Sprint Championship. It was a starting point for us, and I would learn in the following months if it was suitable for us. Briefly, the car felt superb on road and track, but we found that fully loaded up with luggage and the 2 of us this summer for our Euro Tour, the springs were obviously too soft. I will be changing them for something a little harder very soon, perhaps 150lb or maybe 170lb. Again on David's advice I fitted a 1/2 inch (orange) anti-roll bar at the front, and the thinnest anti-roll bar at the rear as well, which I think was also 1/2 inch. While we fitted these I also took the opportunity to replace all the bushes and ball joints associated with these components.
Fitting the new parts was basically a straight swap and so pretty straight forward. The only problems were caused by the lower front damper mounting bolts, which fix the damper to the lower wishbone. These bolts would NOT come out. We tried airguns, pints of release fluid and brute force. After 2 days of all the above it finally took cherry red heat to get them out! Ten year old Loctite had meant they would not budge.
It was apparent right away that the old bushes had needed replacing. We put new damper bushes in at each end, new swing arms at the rear (cheaper to buy 2 new ones than clean, repaint and re-bush the old ones) and replaced all the A-frame and de-dion bushes. As soon as we set the car down its stance had changed, and the sagginess which had appeared at the front went away. We did a basic set up which has proved to be pretty good, but at some point in the future I would like to get the car flat-floored and set up properly. I will wait until I decide on a rear spring before doing this.
Rear adjustable anti-roll bar is here shown in its 'softest' setting (see below) Moving the small linkage along the roll-bar arm, using the adjustment holes - would stiffen up the ant-roll bar's action.
I am very impressed with the adjustable nature of the dampers. Small dials at the bottom of each damper allow them to be softened off or stiffened up, depending on conditions or whether the car is being used on road or track. A couple of clicks makes a huge difference, and we tend to use the dampers at their softest for all road use - the roads around here are pretty bumpy and 'jiggly'. On track it takes seconds to stiffen everything up a little. Keeping things soft on a wet track also makes a huge difference. The Freestyle dampers also have adjustable ride height rings on them, making ride height adjustment (!) easy with a couple of turns. I have started to successfully play with ride height and used it to kill a lot of understeer in the car - this was particularly apparent while at a damp Llandow track day, where Freestyle's Gary was on hand to provide pointers and advice on what to try. The transformation to our car after fitting all the new kit was instant, as one would expect. The car felt much more pointy, and on-track understeer had been massively reduced. I have only just started to explore different settings, ride heights etc, but it is very gratifying to be able to make a change (in ride height for example) and feel the result right away.
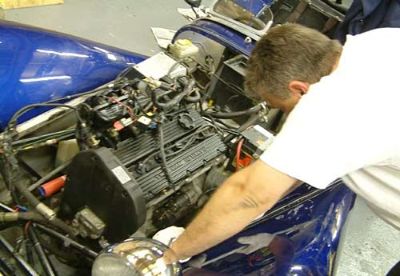
We needed to take the engine and gearbox out so that we could replace our flywheel, which had had its ring gear damaged by a faulty starter motor. We had lived with this for a while, but finally needed to get it sorted.
Needless to say Mark helped, and in fact he removed the engine one evening on his own.
|

 To be honest, Mark's garage is not normally this messy - it only seems to get that way when our car is there - can't think why...
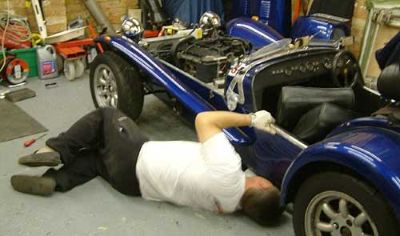 Mark tickling my car - I suspect you could get arrested for doing this in public...
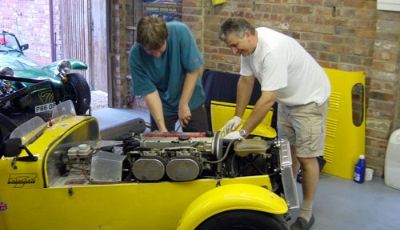 Mark helping yet another 7 owner (Andrew) with his car - note the next car lined up and ready to come in!!
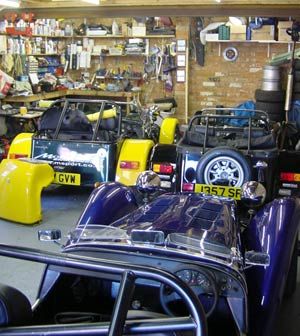 As you can see, we are not the only ones to use Mark's garage! Many users of Blatchat have benefited from Mark's generosity in offering both his time and garage space to help people fix their cars, upgrade bits, take their engines out or even, in one case, provide a safe place to store their car for a week or two.
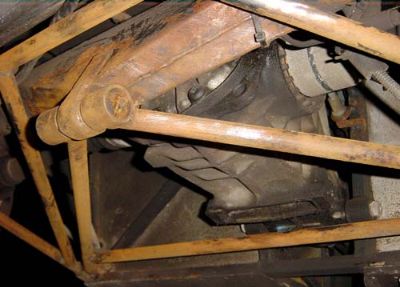 De-dion tube, A-frame and chassis tubes at the rear of the car.
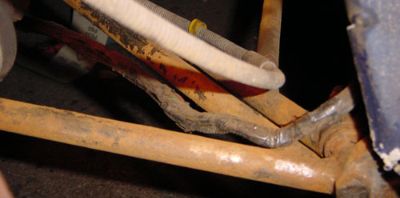 A-frame junction.
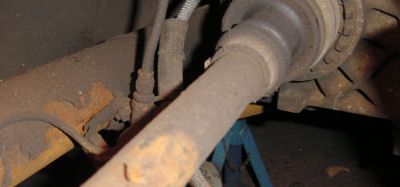 Half-shaft and De-Dion tube, showing how the paint flakes off to expose the rust below.
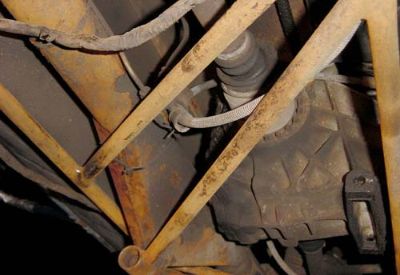 I started to clean all these parts in situ, but in the end I cleaned and repainted them all off the car - where access was much easier and the job could be done properly. I painted all the parts with Smoothrite, which provides a tough rust inhibiting coating, and looks good.
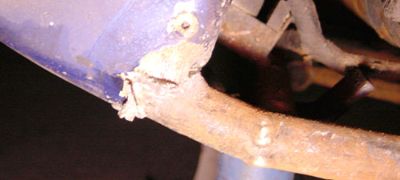 Rear section of chassis, showing oxidizing reaction between aluminum and steel parts.
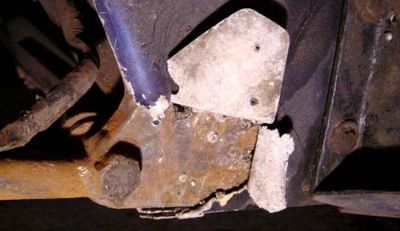 I have peeled back the damaged skin here to allow access to the chassis below, so I can clean it and waxoil it as best I can to prevent further damage.
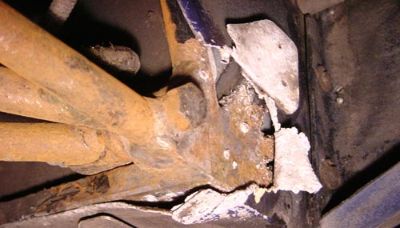 This is the chassis below the rear wheel arch, where the A-frame is bolted to the chassis itself. The damage is hidden by the wheel arch, and cannot be seen in normal view.
 One of the signs that we needed to fix a few things was uneven tyre wear. Everything was beginning to sag and this was changing the suspension geometry.
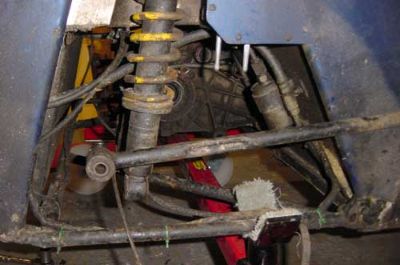 Showing rear swing arms, springs and dampers - the half-shafts and hubs have been removed. You can also see the fuel filter mounted on the back of the rear bulkhead.
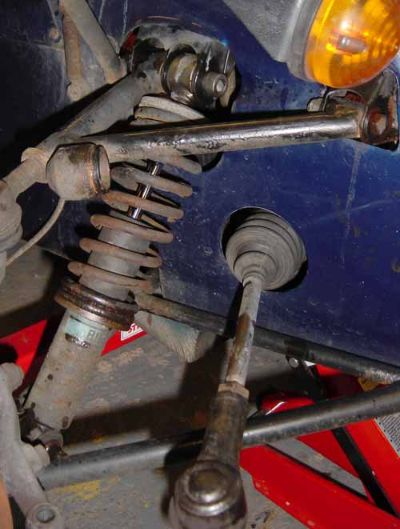 Front suspension components (anti-roll bar has been removed) showing signs of corrosion and a long, hard life! Original Bilstein dampers have done pretty well considering the mileage and use the car gets! Assuming they are original they have done 70,000 miles and are almost 10 years old.
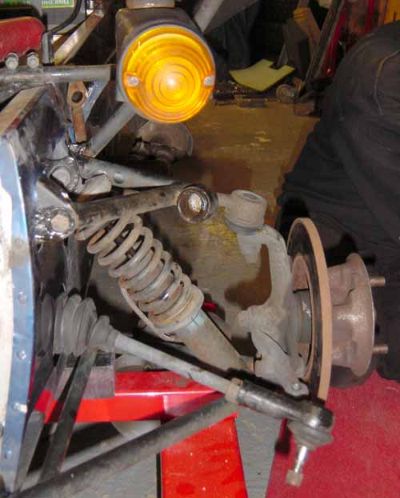 Gradual dismantling continues - here the brake caliper has been removed, anti-roll bar removed and steering arm has been un-bolted from the hub assembly.
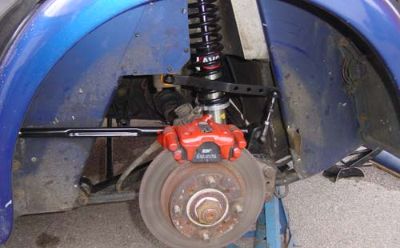 Nice new gleaming components in place at the rear. Swing arm and damper/spring are new, as is the anti-roll bar. Original caliper has been tarted up by Mark!
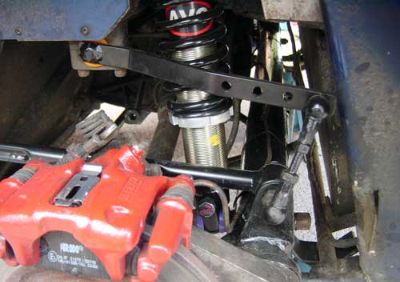 Showing Freestyle AVO adjustable damper and 125 lb springs - these would prove to be great, but perhaps too soft for our touring use!
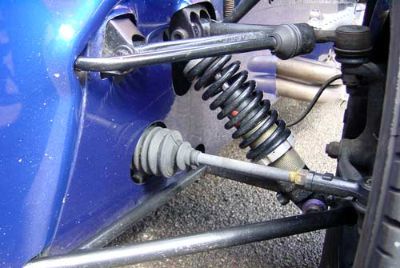 New anti-roll bar, new Freestyle adjustable damper and 250 lb springs. I also stripped and painted corroded areas on the wishbones and steering components.
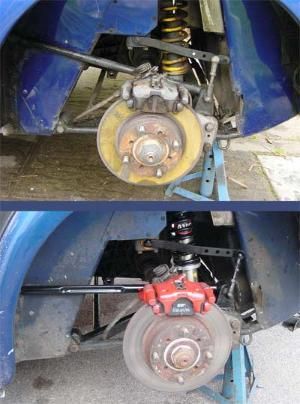 We made this change a few years ago now, but if you look under the rear wheel arch you will see that that there are 2 possible mounting holes for the tie bar where it attaches to the chassis. The tie bar is the black rod which links the De Dion tube to the chassis. The top picture shows the 'comfort' setting - note the angle of the bar. The lower picture shows the tie bar in the lower mounting point - this is the 'track' setting. I can recommend moving the rod down to the lower setting - the car is still comfortable, but it makes the rear much more settled. Some chassis bushes are threaded, some require a nut and bolt, accessible behind the seat backs in the cockpit, you may have to drill an access hole in interior skin to get to this fitting.
 'ok - undone that bit - now what....?'
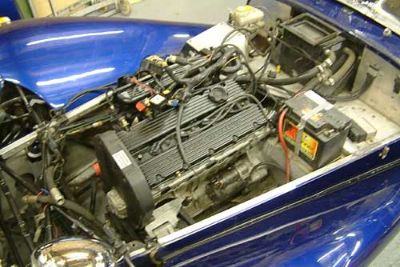 Our car has removebale engine bay braces which make engine removal much easier. These diagonal chassis members run from infront of the heater forward to the front of the chassis on both sides. Here they have been removed already.
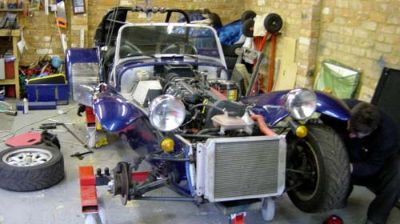
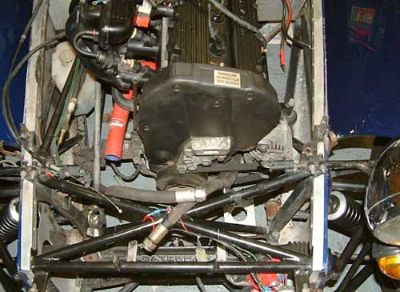 Apollo tank, radiator and exhaust manifolds have been removed, ready to undo the mountings, fuel lines and wiring loom before lifting the engine out.
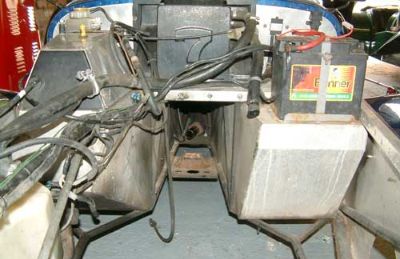 Engine and gearbox out for the first time. Big empty gap left with loose cables, pipes and drive shaft visible.
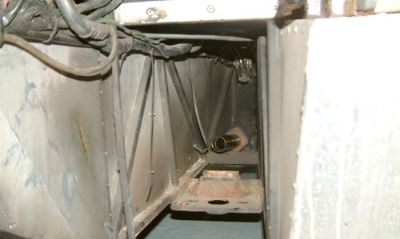 Rear gearbox mounting and drive shaft visible through the transmission tunnel. You can also see parts of the wiring loom and the underside of the handbrake mechanism.
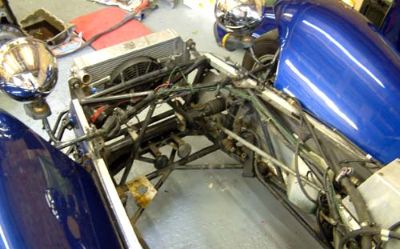 Front of the engine bay. Small brownish bracket mounted on the chassis cross-members is actually for the Apollo tank.
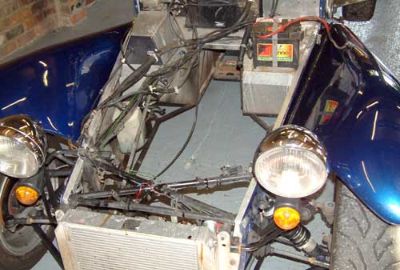 Taking the engine out allowed a better inspection of the engine bay and chassis, which although dirty looked pretty good.