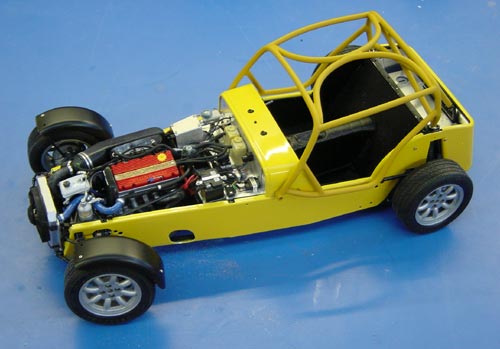
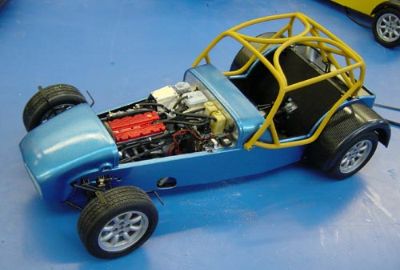
 Second R500 model under way. Engine bay is 99% complete, and roll cage has just been assembled in place. It will be removed for finishingand painting. Second R500 model under way. Engine bay is 99% complete, and roll cage has just been assembled in place. It will be removed for finishingand painting.
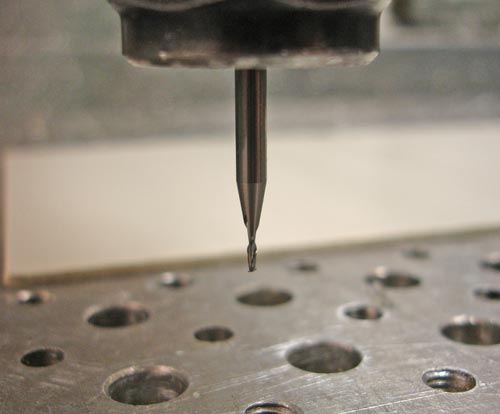
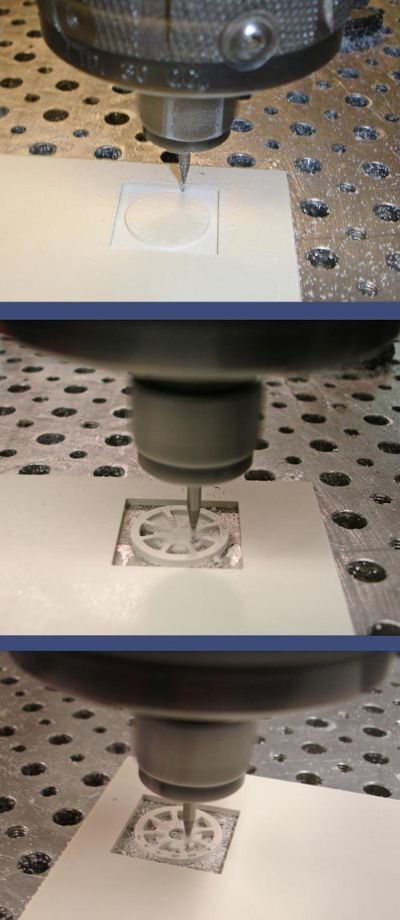
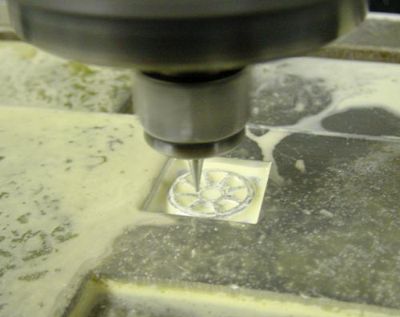 R500 wheel hub being machined from aluminium. The 3D computer image on the previous page is used to create a cutter path for the milling machine. The job was left over night to complete. R500 wheel hub being machined from aluminium. The 3D computer image on the previous page is used to create a cutter path for the milling machine. The job was left over night to complete.
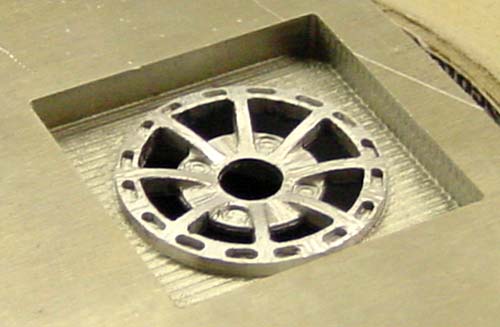
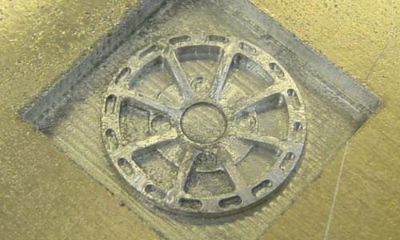 The finished wheel. It must now be trimmed by hand. A 1mm cutter was used to mill the wheel, which is about 26mm across. The finished wheel. It must now be trimmed by hand. A 1mm cutter was used to mill the wheel, which is about 26mm across.
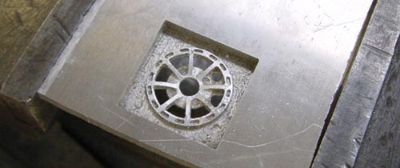 The 'backing' to the wheel is carefully removed with needle files. The 'backing' to the wheel is carefully removed with needle files.
Getting there! Big thanks to Vince for helping in this process. The metal wheel will now be used to create a mold, and then hubs will be vacuum cast. The rim is to be turned.
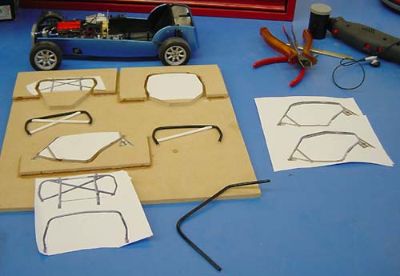 Roll cage was scaled from the many pictures I had taken, and the paper prints used to create formers. Plastic tube had wire inserted in it, and this was then bent around the formers. Roll cage was scaled from the many pictures I had taken, and the paper prints used to create formers. Plastic tube had wire inserted in it, and this was then bent around the formers.
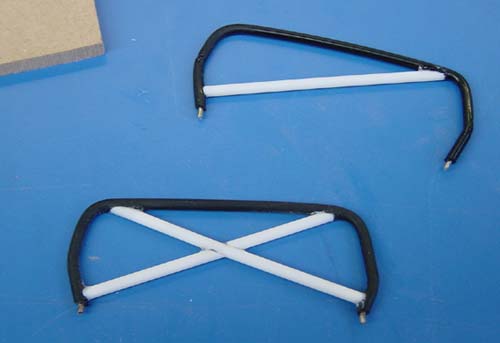 | | Although the formers helped, most of the shaping was done 'by hand'. Super glue is used to fix the plastic tube together. Where possible I have also used pins to strengthen the joints. |
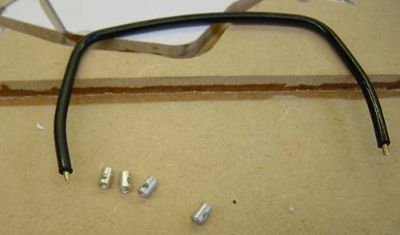 Windscreen surround. The aluminium tube is used to model the mounting point on the corner of the SLR cage which mounts onto the side of the scuttle. Windscreen surround. The aluminium tube is used to model the mounting point on the corner of the SLR cage which mounts onto the side of the scuttle.
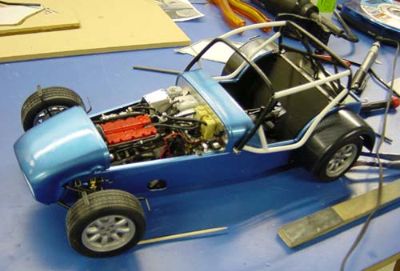
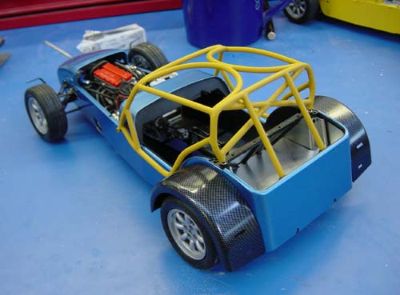
 Rear and front sections of the cage in position. Not fixed at this stage as the cage will have to be removed in order to clean joints and paint. Rear and front sections of the cage in position. Not fixed at this stage as the cage will have to be removed in order to clean joints and paint.
 Constructing the cage in situ is the only way to get the curves right, but its a fiddle trying to hold it all together whilst trying to fit each bar! Constructing the cage in situ is the only way to get the curves right, but its a fiddle trying to hold it all together whilst trying to fit each bar!
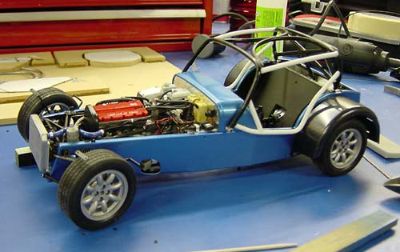
 Gradually coming together and the addition of the cage gives the model a better sense of proportion. Gradually coming together and the addition of the cage gives the model a better sense of proportion.
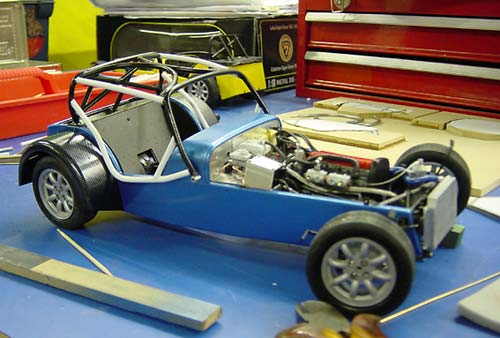 | | Cage completed. A full days work. Just got to do the other one now! |
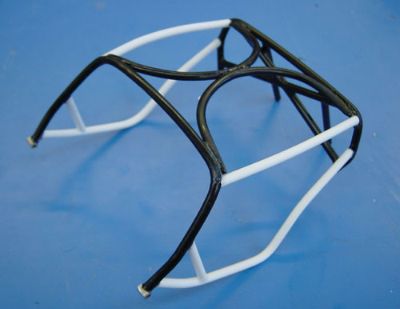 First cage - thankfully it had not stuck to the model during construction! Joints needed cleaning up, bit of filling and some primer. First cage - thankfully it had not stuck to the model during construction! Joints needed cleaning up, bit of filling and some primer.
 Yellow is primer - the cage will be black. Looks great in one colour. Yellow is primer - the cage will be black. Looks great in one colour.
 Note: I shall not be usingthe carbon finish as supplied in the kit, as seen on the rear wings here. It is too strong. I have found that a very light spray of semi-gloss black paint allows the pattern to show through in a more subtle way. Note: I shall not be usingthe carbon finish as supplied in the kit, as seen on the rear wings here. It is too strong. I have found that a very light spray of semi-gloss black paint allows the pattern to show through in a more subtle way.
 Second cage under way. Frustratingly I have just run out of the correct diameter plastic tube....grrrr Second cage under way. Frustratingly I have just run out of the correct diameter plastic tube....grrrr
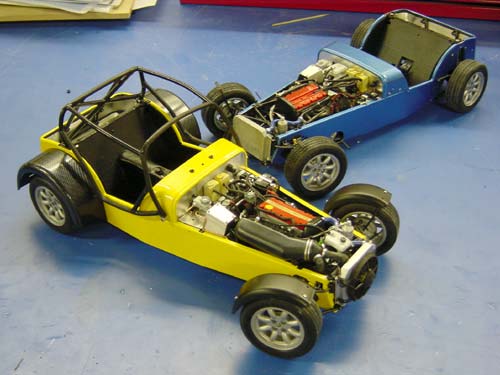 | | The two R500's. |

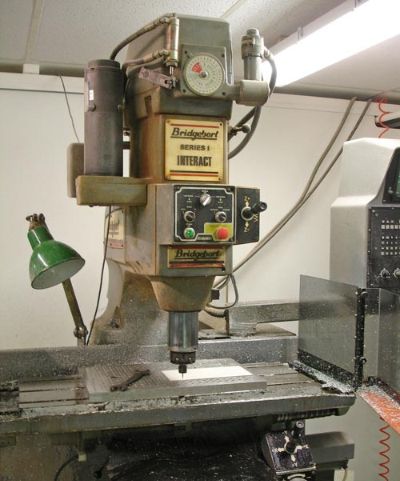 Very big milling machine used to make wheels. Very big milling machine used to make wheels.
1.5mm milling bit. Having made the first wheel in metal, we then decided to try plastic - itgives a much better finish and doesn't break quite as many drilling bits!
 Wheel centres being machined out of plastic sheet. We did all 8 wheels in one hit 0 although it did take about 12 hours! Wheel centres being machined out of plastic sheet. We did all 8 wheels in one hit 0 although it did take about 12 hours!
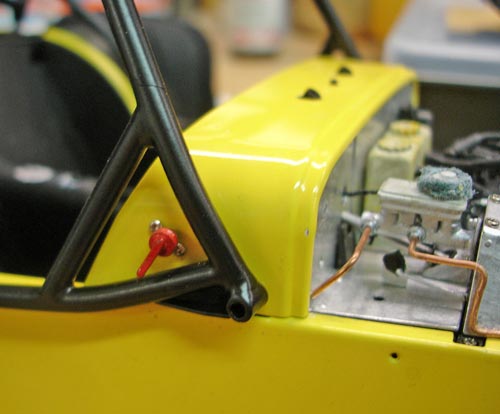
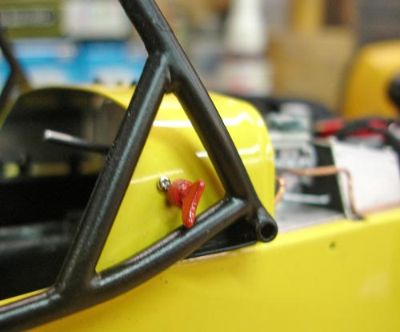
 Emergancy cut-off switches as found on both Caterhams. Emergancy cut-off switches as found on both Caterhams.
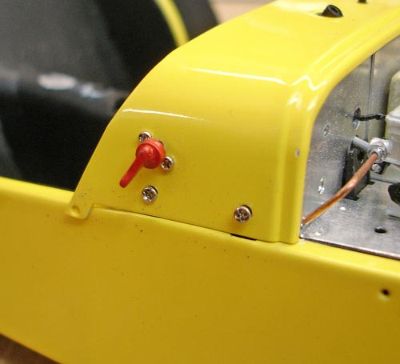 Fitted - simply glued into a hole - the two screws emmulate the fixing bolts on the real thing. Fitted - simply glued into a hole - the two screws emmulate the fixing bolts on the real thing.
 | | With cage in position. |
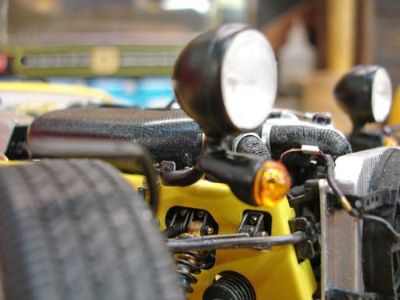 Headlights and indicators fixed. Headlights and indicators fixed.
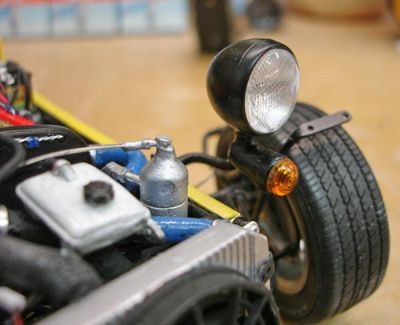 Both the indicator pod and the mounting bracket are scratch built, as the model comes with older style flat fitting plates. More fiddly work!! Both the indicator pod and the mounting bracket are scratch built, as the model comes with older style flat fitting plates. More fiddly work!!
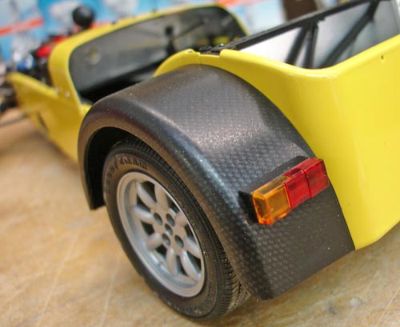 Rear wings and light blocks fitted - not my 'fake' carbon effect - very very light spray of light grey primer through a very fine mesh held close. I like the effect - not too strong or bold. Rear wings and light blocks fitted - not my 'fake' carbon effect - very very light spray of light grey primer through a very fine mesh held close. I like the effect - not too strong or bold.
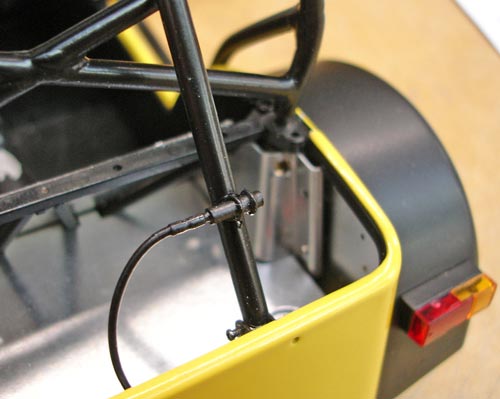 | | Stack dash race sender tie-wrapped to the roll bar. This sends a timing signal back to a beacon to time lap times in races and testing....wire will disappear under the boot cover when fitted. |
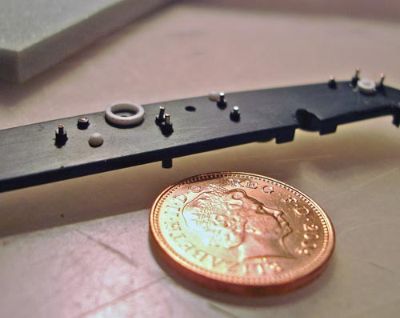
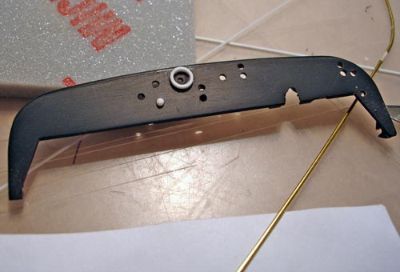 Dashboard. I machined the texture off the model supplied dash as Richards are carbon. I have started to add bezels and drilled holes for the toggle switches. Dashboard. I machined the texture off the model supplied dash as Richards are carbon. I have started to add bezels and drilled holes for the toggle switches.
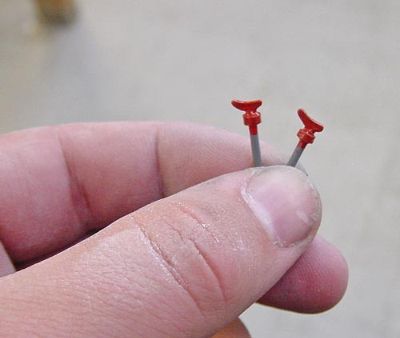
 I have used semi-stripped wire to represent the toggle switches - seems to work quite well! I have used semi-stripped wire to represent the toggle switches - seems to work quite well!

|