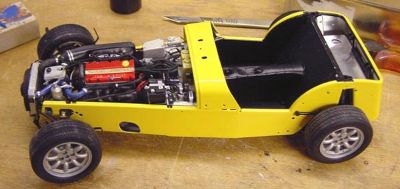
 Richards R500 in its current state Richards R500 in its current state
Richards models are based on the Tamyia 1:12 Kits. The detail in these is amazing, but I try to go one step further with more detail! With Richards car I soon found that just about every component was different from the kit. These take a huge amount of time,and I must thank Richard, and indeed the other customers who are patiently waiting for their models. they have all been very understanding in that at the moment earning 'real' work must take priority. I started making the models when I was in a period of redundancy and had far more time. They WILL be finished eventually - thanks for your continued understanding!
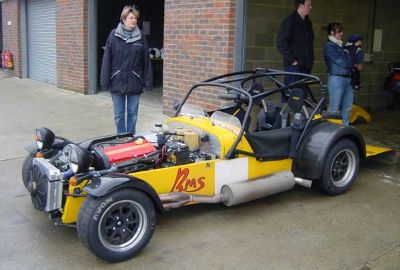 The real car. Picture taken at Snetterton where Richard invited us for the day to take lots of pictures. The real car. Picture taken at Snetterton where Richard invited us for the day to take lots of pictures.
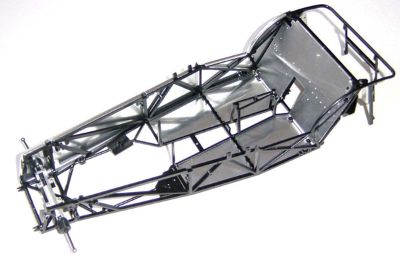 The model chassis. Yes - real aluminum panels are used. Its a great way to study what your car looks like under the skin. The model chassis. Yes - real aluminum panels are used. Its a great way to study what your car looks like under the skin.
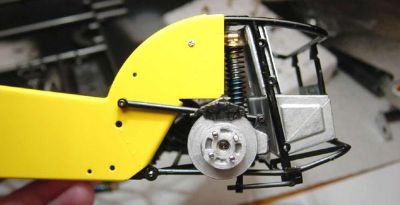 Detail of rear suspension - of course it actually works! Detail of rear suspension - of course it actually works!
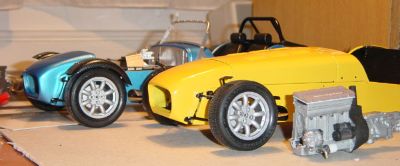
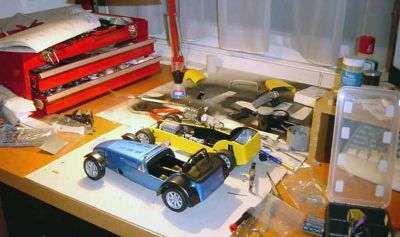 My original workshop - in the spare bedroom of our Balham flat. Here you can see Richards two R500's after the chassis and body shells have been completed. My original workshop - in the spare bedroom of our Balham flat. Here you can see Richards two R500's after the chassis and body shells have been completed.
 Note k-series engine. Again, the model comes with a very detailed BDR engine - I needed a k-series, so had to start again! Note k-series engine. Again, the model comes with a very detailed BDR engine - I needed a k-series, so had to start again!
 Engine detail, early on. It has changed again since this shot was taken. R500 exhaust a nightmare to shape and install! Engine detail, early on. It has changed again since this shot was taken. R500 exhaust a nightmare to shape and install!
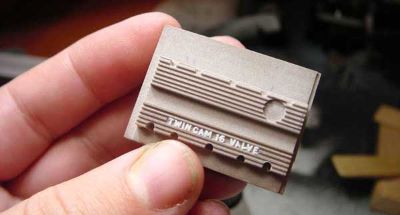 I have milled a k-series head cover, which I have then cast. Text is 1mm high plastic lettering. Drop a letter and its gone! I have milled a k-series head cover, which I have then cast. Text is 1mm high plastic lettering. Drop a letter and its gone!
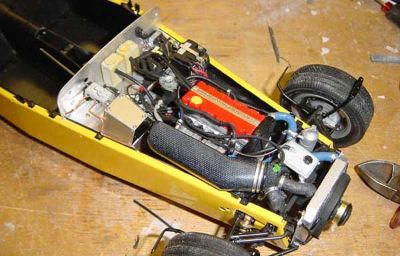
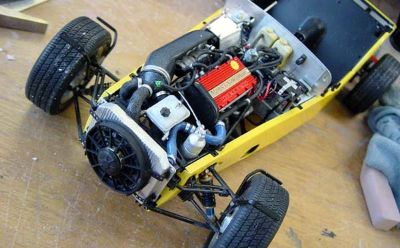
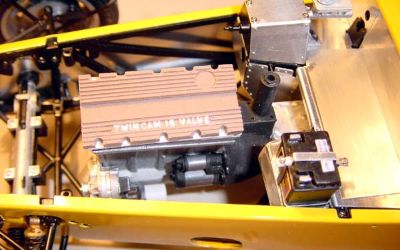 Early test engine fitting - I could not actually install until all the ancillaries were fitted. Note the scratch built dry sump detail. Early test engine fitting - I could not actually install until all the ancillaries were fitted. Note the scratch built dry sump detail.
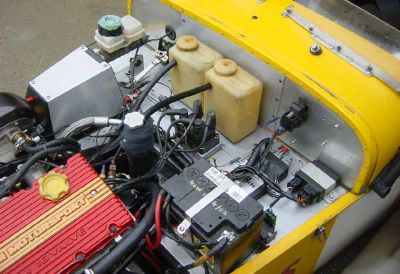
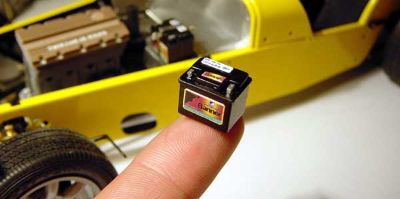 Banner Battery. Had to make this as well - kit had wrong type. I photographed the real battery the made tiny stickers for the model one. Banner Battery. Had to make this as well - kit had wrong type. I photographed the real battery the made tiny stickers for the model one.
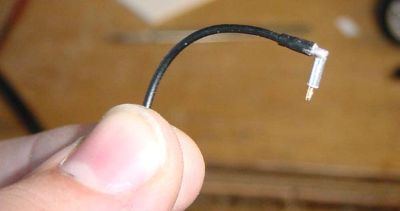 One plug lead. You are looking at 5 individual components for this end alone. trouble is - once you start with the tiny detail, you can't stop! One plug lead. You are looking at 5 individual components for this end alone. trouble is - once you start with the tiny detail, you can't stop!
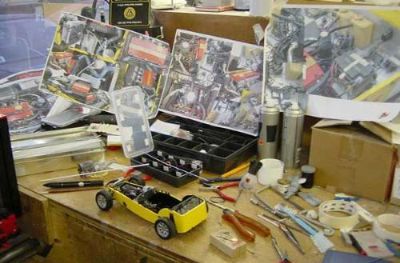 My latest office! IDC, the company I am currently work for, have given me a corner of their workshop to work from, so I have access to more equipment and expertise, and can make more of a mess! You can see the blown up pictures of Richards car that I am working from . My latest office! IDC, the company I am currently work for, have given me a corner of their workshop to work from, so I have access to more equipment and expertise, and can make more of a mess! You can see the blown up pictures of Richards car that I am working from .
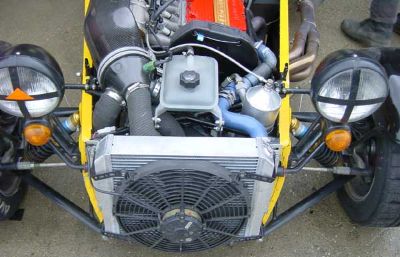
 Richard has a bigger radiator and fan than the model - here you can see the individually shaped fan blades before assembly, along with the Apollo tank detail fitted. Richard has a bigger radiator and fan than the model - here you can see the individually shaped fan blades before assembly, along with the Apollo tank detail fitted.
 Just about finished engine, showing carbon air box fitted. It does look great inthe flesh - pictures do not do it justice. Thats one down - one to go! Just about finished engine, showing carbon air box fitted. It does look great inthe flesh - pictures do not do it justice. Thats one down - one to go!
 Spot the difference! The real engine for reference. Spot the difference! The real engine for reference.
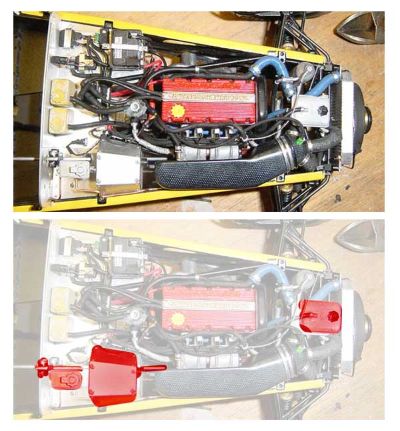 This image highlights the components that I was able to use from the existing tamiya kit - everything else you can see in the engine was scratch built. Mad! This image highlights the components that I was able to use from the existing tamiya kit - everything else you can see in the engine was scratch built. Mad!
 The real car showing radiator and Apollo tank details. The real car showing radiator and Apollo tank details.
 The kit equivalent. The kit equivalent.
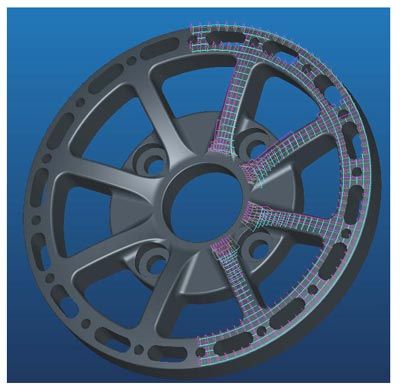 R500 wheel. Of course the kit comes with minilites, so these must be modelled. here we have inputted the design into 3D (pro-engineer) We can then machine the tiny wheels from this file. The holes for fittingthe wheel are about 1mm! R500 wheel. Of course the kit comes with minilites, so these must be modelled. here we have inputted the design into 3D (pro-engineer) We can then machine the tiny wheels from this file. The holes for fittingthe wheel are about 1mm!
I shall add pictures to this as I complete the model - next stage is interior, with a completely new dash, complete with stack dash, carbon race seats, and a full roll cage!
|